Growing seedlings without soil is becoming more and more relevant every year for a number of reasons, the most important of which can be considered getting rid of infection with a dangerous disease - blackleg. The causative agents of pathogenic infection do not cause any harm for the time being, but when greenhouse conditions are created, they become more active, severely damaging fragile seedlings. An excellent way to grow seedlings without soil allows you to eliminate the occurrence of diseases during the seed germination stage. This article is all about how to grow vegetable seedlings without soil on toilet paper or in plastic bottles, innovative technology and the advantages of the method. Seedlings without soil - three ways to grow.
Filter paper or napkins are very suitable for germinating seeds.
The classic method of growing seedlings in containers with soil requires significant free space to accommodate boxes and containers with plants. If the farm does not have a greenhouse, this method is very inconvenient - containers for growing vegetable crops occupy all the window sills in the house or apartment, cluttering loggias and balconies. Considering that growing seedlings lasts several months, this amounts to a fairly long period of inconvenience. In addition, the earth spills onto the floor and is carried by the wind, increasing the time for cleaning the premises.
Several interesting ways to grow seedlings without soil allow you to germinate seeds in compact containers that do not take up much space. These methods have some advantages that are worth talking about.
With landless technology for growing seedlings, the following advantages can be achieved:
There are interesting ways to grow vegetable seedlings that do not require soil. Without soil, you can grow flowers and vegetables, including sowing tomato seeds. Any seed initially contains an energy potential that helps the seed germinate. By the time the cotyledon leaves are fully developed, the supply of nutrients runs out, so sprouted seedlings require a soil mixture. But before transplanting tomato seedlings or other vegetables into the ground, it is necessary to grow seedlings using one of the possible methods.

Large seeds are convenient to spread by hand.
No soil is needed if you grow tomato or other vegetable seedlings on toilet paper. With this method of germinating seeds, you will need to prepare a roll of toilet paper, plastic film and transparent containers. You can sow any vegetables on toilet paper, but it is more convenient to grow seedlings from large seeds, for example, tomato seedlings.
The secret of success is timely transplantation into the soil substrate, before the seedlings lose turgor and begin to stretch.
To begin with, you should prepare strips of polyethylene film measuring 10x50 cm. Each strip is covered with toilet paper, which is moistened with water. Using tweezers, you need to spread the seeds on wet paper, stepping back from the edge from 1 to 1.5 cm, after which you should cover the seeds with another layer of polyethylene. The strips with the planted seeds are carefully rolled into a roll, which is secured with a rubber band.
The finished rolls are installed vertically in a plastic container, bringing the water level to 4 cm in height.
The container with rolled tubes should be placed in a bag with holes for ventilation of the plantings. Hatched seeds can be fed with mineral fertilizer in low concentration. In the phase of the appearance of the first leaf, fertilizing is repeated, and the seedlings are selectively planted in a sterile nutrient substrate. The soil should be light, nutritious and permeable.

The signal for replanting is fully developed cotyledon leaves.
Used plastic bottles can also be used to grow seedlings for your garden. First, the bottles must be cut in half lengthwise. Several layers of filter or toilet paper and napkins are placed in each half, which are thoroughly moistened with a spray bottle.
The seeds of tomatoes, cucumbers, zucchini, peppers, and eggplants are laid out by hand. Small seeds are scattered on a wet napkin in an even layer, and then covered with the second half of the bottle.
It is very important to use only clean and clear plastic containers.
The container with the crops is placed in a sealed plastic bag, not forgetting to leave a hole for ventilation. You should periodically check the moisture content of the wipes, adding additional moisture if necessary.
Young plants can be planted in the ground when cotyledon leaves appear, and the ground must be disinfected.

Strong seedlings of vegetables and flowers grow among the sawdust.
Vegetables or flowers without soil can be grown in sawdust; seedlings only need soil during planting at the first pick.
The sawdust must rest before it can be used for this growing method. Before use, the sawdust substrate is poured with boiling water and disinfected.
Containers are filled with the swollen substrate, the layer height is up to 15 cm. The seeds are placed in sawdust, the planting depth is up to 2 cm.
The box is covered with film and placed in a bright place. The sawdust should not be allowed to dry out. The soil is used for transplanting seedlings in the cotyledon leaf phase.
Landless growing methods help to obtain healthy plants for the garden and garden, avoiding infection with pathogenic infections.
Kirill Sysoev
Calloused hands never get bored!
There are many ways to grow seedlings at home. One of them is carried out using toilet paper, without using soil. It is relatively new, but already very popular. All people who love gardening should learn more about it.
The technique, which is also called the Moscow method, is ideal for people who live in cramped apartments, because it is simple and inexpensive. This method is best used for vegetables and some types of flowers. With its help you will be able to grow the following crops:
Growing seedlings on toilet paper has the following advantages:

There are two technologies. The first involves the use of a roll and a glass. The second technology involves growing seedlings on toilet paper placed on a cut plastic bottle. Both methods are equally simple and can be done even by a person who has decided to try his hand at gardening for the first time. Check out both technologies and choose the one that seems most convenient for you.
Step by step instructions:

Use this instruction:

The overwhelming number of gardeners grow seedlings mainly in the ground, more advanced people use peat tablets, enthusiasts manage to grow seedlings hydroponically, but almost none of them know that seedlings can be successfully grown on toilet paper.
Given this fact, today we will talk in detail about what it is to grow seedlings without soil on toilet paper, what it gives, and what advantages it has in comparison with other traditional methods.
This method appeared relatively recently, only about 20 years ago, and every year it is slowly but surely gaining an increasing number of its admirers.
The method is based on the fact that plant seeds already have a sufficient supply of nutrients, which will be enough for the first time of seedling growth, usually about several weeks.
Toilet paper, due to its structure, acts as a stimulator for seedling growth, simulating a soil substrate, which is extremely easy to maintain moist and control the temperature.
As can be seen from the information above, the principle of operation of this method is extremely simple, but before we talk about its implementation, we should list its main advantages, indicated in the following paragraphs:
As can be seen from all this, the ability to plant seeds for seedlings in toilet paper has a lot of advantages, which sometimes overshadow other methods of traditional growing, which is especially true for point 4 from the list above.
Despite this, growing seedlings on toilet paper also comes with some disadvantages, such as:
In general, these shortcomings are completely leveled out with a competent approach to the matter, but first things first.
Here it should immediately be noted that growing on toilet paper is unacceptable for heat-loving crops, and especially tropical ones.
The fact is that such plants urgently need sunlight, and at the same time, a plentiful amount of it, and the structure and development of the root system in any case will require growing in the ground.
Also, this method is not applicable for long-developing and slow-growing plants, due to the fact that it is very difficult to maintain and change the paper substrate for months.
Based on this, we can make a logical conclusion that seeds of agricultural crops oriented to the northern and subtropical regions of the Earth are suitable for growing seedlings.
So, if you decide to grow seedlings on toilet paper, choose seeds from the following groups of plants:
It is the plants listed above that are ideal candidates for growing in toilet paper, with minimal risk of failure and maximum chance of getting a healthy and abundant harvest.
To begin with, it must be said that growing seedlings on toilet paper occurs in the following two ways:
Standard growing of seedlings on toilet paper is the simplest method from a technical point of view, which will require more careful monitoring of the level of humidity, and in some cases, ensuring that the seedlings do not stretch.
Growing seedlings using plastic bottles is a somewhat more technically complex process, which allows you to less carefully monitor the moisture level, and also almost completely eliminates the risk of the seedlings being pulled up!
To start growing seedlings using the presented method, you should prepare a set of the following items:
Having acquired such materials, you can proceed to the stage of planting work itself, which will consist of the following points:
In this way, an improvised greenhouse in a film is obtained, which, on the one hand, is constantly moistened from the outside, and on the other, thanks to the film, the seeds are constantly in a moist state, protected from drying out, weathering, and damage of a mechanical and organic nature.
To plant seedlings on toilet paper in a plastic bottle, you should prepare the following materials, such as:
The process of planting seeds is as follows:
At this point, the process of sowing seeds on toilet paper in a bottle can be considered complete. Instead of a bottle, you can use any container, including a food container.
There is no need to water the resulting greenhouse; only in the most extreme cases, when the film was not stretched airtight, it makes sense to lightly spray it with water and cover it again with cellophane, but this time airtight.
Germinating seeds on toilet paper is an easy way to get healthy and lush seedlings, which, unfortunately, does not negate subsequent care for them, as well as the implementation of several peculiar features of picking.
Thus, caring for seedlings begins already when the first leaf appears on the overwhelming number of planted seeds, because it is during this period that they need to be fed.
Fertilizing is carried out using an aqueous solution based on a mineral complex of fertilizers for seedlings, a universal or specialized (for a specific variety) profile.
The mineral complex is diluted with water in a dosage that is 2 times less than that indicated on the package. Water with fertilizers is poured into a glass containing a roll of toilet paper with seedlings, or carefully poured over toilet paper in a bottle.
It is better not to use a spray bottle so that the minerals deposited on the leaves of the seedlings do not form stains, spoiling the appearance and impairing oxygen exchange.
The next feeding of this kind is carried out when the seedlings sprout another 2-3 leaves.
In general, the seeds contain a sufficient level of nutrients that can initially ensure the survival of seedlings without feeding, but in this case they will be significantly inferior in development to the samples that were fed (which will negatively affect the yield of the former).
Also, you should monitor the level of water in the container, constantly adding it, in order to avoid even partial drying of the paper, since in this case this will immediately lead to the withering of the roots of the seedlings.
When the seedlings have become stronger and have put out several true leaves, they begin to pick them.
Seedlings for picking are taken by carefully unwinding rolls of sprouted seeds, after which each seedling is carefully pulled out of paper softened by moisture and planted in a previously prepared container with soil.
A similar action is carried out with seeds sprouted in a bottle, but in this case, they are simply carefully pulled out without damaging the roots. When pulling out seedlings, do not worry; paper softened by moisture will easily give up the roots of the seedlings without offering resistance.
The soil itself and containers for planted seedlings are similar to those needed for seedlings germinated in ordinary soil. Moreover, the root system of seedlings that have been removed from the soil may have remnants of this paper on it, which do not necessarily need to be removed.
Toilet paper in the soil will not interfere with the development of roots, and over time it will completely dissolve.
For this reason, some gardeners do not remove the seedlings from the paper, but carefully cut out the sprouts and their root system along with the part of the paper where they grew.
This method is applicable only in cases where the seedlings are not tangled with each other by their roots.
Today we examined in detail the main methods of germinating seeds on toilet paper, the sowing of which can be successfully used even in an apartment, at any time of the year.
The method is perfect for indoor growing of seedlings, since it is extremely simple, unlike hydroponics, and allows you to avoid accidental contamination of the room with soil, as with classical growing. Any beginner, even a child, can grow seedlings on toilet paper!
Source: http://rassada.info/uhod/rassada-bez-zemli-na-bumage.html

About 10 years ago, gardeners began to practice growing seedlings without soil.
This is not due to a lack of land or saving time, but to the ability to provide seeds with a more productive background, eliminate competition for nutrients, carry out picking/transplanting without damaging the root system and eliminate a number of diseases.
Today, growing seedlings without soil at home has become even easier - manufacturers even produce special bags for seedlings of peppers and tomatoes without soil. How does this even happen?
In fact, these are far from new ways of growing seedlings.
Planting material was grown without soil back in the distant Soviet times, when it became clear that mistakes lead to the development of diseases.
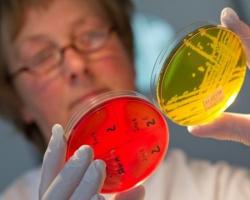
For example, the most severe disease of tomatoes is blackleg - rotting of the base of the stem, in which an apparently healthy plant dies.
Blackleg disease is a disaster for tomatoes
This happens due to natural processes - when the soil dries out, its level decreases, the neck of the root becomes exposed and becomes covered with a dry crust.
They watered the pot, the soil level rose, closed the neck, and in the place where the crust was, rotting begins. That's it, this process can no longer be stopped.
But if you look at the methods of producing tomatoes without soil, it becomes clear that constant moisture eliminates the risk of any disease, not just blackleg.
There are quite a few methods for obtaining seedlings, from which everyone chooses the one that suits specific conditions.
For example, in a greenhouse, growing cucumber seedlings without soil is impractical - the very basis of the greenhouse makes it possible to obtain strong and healthy seedlings.
Here, warm beds are used and covered with thick polyethylene to create greenhouse conditions.
Reading with this article: How to make warm beds
If boxes with seed are placed in a greenhouse, it also does not make sense to use a new method.
Basically, they try to use the method of growing seedlings without soil at home, when the seedlings grow on a windowsill.
In this case, it is possible to provide them with enough light for germination and not take up the entire free space of the apartment with boxes.
We currently know the following options:
Each of them is an excellent way to grow seedlings, but it’s worth going into detail about the description.
The substrate is replaced by ordinary toilet paper, and plastic bottles act as containers.
One method is growing on toilet paper.
There are 2 main options:
For this you will need:
Technology:
This roll is placed in a bottle or glass
Don't confuse the roll where is the top and where is the bottom.
The first loops will appear on the 3-4th day.
For this you will need:
Technology:
Vertical option for sowing seeds
On the 3-4th day, the first shoots appear, after which the bag is removed, and the containers themselves are moved to a well-insulated place under the lamps. There should be no drafts or sudden changes in temperature.
Growing seedlings of peppers, tomatoes, flowers or cucumbers in sawdust is just as successful as in toilet paper, especially since the technique is generally similar, although there are certain nuances.
Sawdust for germinating cucumbers without soil
To disinfect, soak sawdust for 15-20 minutes in a medium solution of potassium permanganate (medium pink tint). Next, pour boiling water over the entire mass and wait until they swell.
After 2 cotyledon leaves appear on the sprout, they can be picked into separate containers.
It is very convenient that loose sawdust does not hold the root and the sprout is easy to remove from the container.
This is especially important for pepper seedlings without trauma to the roots; they easily adapt and quickly begin to grow.
VIDEO: How to sow cucumbers in sawdust
Growing cucumber seedlings without soil, as well as other crops, has a number of key advantages compared to the classical method:
There are more than 100 seedlings in such a small container
The most serious disease is blackleg. It has already been described previously how exactly the disease develops, so we will only emphasize that all methods of growing seedlings without soil eliminate the risk of being affected by such a disease.
A productive garden without hassle is not a beautiful slogan or just a phrase. This is painstaking work that can ultimately lead to excellent results. And the first step on this path will be a landless method of growing seedlings.
VIDEO: Methods of growing tomato seedlings
Source: http://www.PortalTeplic.ru/rassada/virashivanie-rassadi-bez-zemli/

The ability to grow pepper seedlings without using soil has a number of significant advantages, and first of all this concerns minimizing the risk of damage to the root system by viral and fungal diseases.
An alternative to the traditional method makes all the work more accessible not only in private homes, but also in apartments.
In this case, it is necessary to take into account the timing, since it is better to do everything a little later than too early.
This mistake will lead to the seedlings themselves being overgrown and too elongated, with weakened stems and even yellowed leaves.
Landless methods of growing pepper seedlings have a number of important advantages, for example:
At the same time, the stems are quite dense and are not susceptible to all kinds of diseases. They easily tolerate all manipulations with replanting and are ready to delight in the future with a large harvest of aromatic peppers.
It has been noticed that plants from seedlings without soil grow faster, and the first harvests can be harvested 5 to 10 days earlier than usual.
The simplicity of the technology does not require special efforts, skills or even financial investments.
A regular roll of toilet paper is a good alternative to numerous boxes of soil.
You also need to add plastic film and several transparent containers to it.
The peculiarity of the method is that the seedlings must be transplanted onto a soil substrate before the stems begin to stretch and lose turgor.
The process of growing pepper seedlings using toilet paper consists of a sequence of steps:
Having grown seedlings, it is important to prepare in advance separate containers with soil for each plant. Only then the roll is carefully taken out and unfolded on a flat, clean, horizontal surface.
If, during the process of raising the seedling, particles of paper remain on the root system, you should not remove it.
Since it will absolutely not interfere with the further development of the pepper root system and obtaining the desired harvest.
As for toilet paper, it should be the most ordinary and cheap, without various flavors and dyes. As an option, you can use paper napkins, but the process of rolling the rolls in this case will be more problematic.
Important! When planting future bushes in the ground, it is necessary to maintain the vertical position of the roots. They should not be laid horizontally or twisted, as this will stop the process of further growth and fruiting.
This method also requires toilet or filter paper. The basis for seedlings can be transparent plastic containers in which confectionery products from the supermarket are packaged.
They can also be replaced with ordinary plastic bottles, cut lengthwise in advance, but not completely. The last option turns out to be a kind of mini-greenhouse.
If you use any container without a lid, then you will additionally need regular cling film.
The preparation process consists of:
After simple manipulations, the first sprouts should be expected already on the 4th – 7th day of cultivation.
If there are no sudden changes in temperature in the room, then the film must be removed 2 - 3 after the first sprouts appear. In this way, the future seedlings are hardened.
In order not to lose the result, the hardening procedure should be increased in time gradually, starting from 1 - 1.5 hours.
You may be interested in:
The main task of caring for germinating seeds is to maintain a moist base.
Especially if the container is open and the moisture evaporates, rather than condensing on the cling film and returning back.
For humidification, only warm, settled water with a temperature of at least 28 - 30 degrees is used.
When sprouts appear, humic substances should be prepared for fertilizer. You only need 2 drops per 250 ml of water. Fertilizer must be applied to toilet paper and plants using a spray bottle.
Repeated feeding is carried out when the cotyledon leaves appear, and then after the formation of 2 - 3 full-fledged leaves on the seedlings. Only then can the seedlings be transplanted into the ground.
If the sprouts have gradually hardened, then it is not necessary to cover the seedlings in the ground with a protective film.
To obtain pepper seedlings without the use of soil, already rested sawdust placed in a plastic or glass container is also useful.
The sawdust itself, together with the container, is first disinfected. For this, a boiling bright pink solution of potassium permanganate can be used.
It is poured into the container and mixed slightly, and then covered with a protective film or lid.
Thanks to this, the effect of full steaming is obtained.
The swollen sawdust is placed in containers to a height of no more than 15 cm, and the depth of the pepper seeds laid out is no more than 2 cm.
The entire box or container is covered with a protective film and installed in a well-lit place.
The mandatory care requirement concerns only keeping the sawdust moist, since even slight drying out of the layers will lead to the death of germinating seedlings.
The peculiarity of this method of growing pepper seedlings is the need to transplant the sprouts into the ground already at the stage of formation of cotyledon leaves.
As in the methods with toilet paper, the result is dense seedlings with a strong root system and complete protection from possible fungal infections and microbes that are characteristic of soils.
Important! It is often possible to grow strong, full-fledged seedlings using a landless method, even from seeds with a long shelf life and of questionable quality.
Arseniy Vitalievich, 45 years old
When growing pepper seedlings in vertical rolls of polyethylene and toilet paper, it is necessary to place the entire container with water and seeds in transparent bags or bags.
This will allow the evaporated moisture to condense on the walls and return to the sprouts. The second point of using bags concerns the protection of seeds from possible temperature changes.
As soon as the sprouts grow a little, the cover must be removed.
Varvara Vasilyevna, 39 years old
When growing seedlings on layers of toilet paper in a horizontal position, even ordinary deep plates, which are no longer used in the kitchen, will do. Placing seeds at a distance of 2.5 - 3 cm will avoid harmful picking of root systems.
If, during preparation for replanting into the ground, particles of toilet paper or napkins remain on the roots, you should not touch them. The first soil fertilization after transplanting seedlings should be done no earlier than 2.5 - 3 weeks.
This will allow the seedlings to get used to and strengthen in new conditions without slowing down their development.
Source: https://sveklon.ru/rassada-perca-bez-zemli

Traditionally, at the end of spring it is customary to plant seedlings of vegetable crops and flowers.
All gardeners and vegetable gardeners are doing this, the scale is amazing! At this stage, a natural selection of the strongest and healthiest plants is carried out.
With the help of seedlings, the loss of seedlings ready for planting in the ground is minimized.
The most popular method is to grow sprouts in soil, in small containers or cardboard packages. But there are also more advanced methods when planting plants does not even require soil.
seedlings on the windowsill
The main secret of successful seedlings without soil is that every seed placed in conditions favorable to it - with the presence of water and heat - will germinate without nutrients that could be taken from the ground. After all, the seeds already contain a supply of everything necessary.
After the first, still weak shoots have appeared, the container is placed in the sun and it absorbs additional elements.
The beauty of soilless seedlings is that they take up little space and require almost no watering. Moreover, a disease such as blackleg, which affects fresh shoots in the ground, will not spoil them in its absence.
sprouts without soil
There are several ways to grow seedlings in a container without soil. The most popular ones use toilet paper, sawdust, ordinary water, etc. instead of soil. Depending on your desire, you can choose one of them or try each one before the summer season, determining the leader for yourself.
The method of growing seedlings with toilet paper is sometimes called the “Moscow” or “roll-your-own” method.
With its help you can plant any crops - cucumbers, tomatoes, peppers, onions, eggplants, etc.
For seedlings you will need a roll of paper, plastic wrap (or simple plastic grocery bags) and disposable cups as a stand.
seedlings in rolls
First, the film needs to be prepared: cut into equal strips 10 cm wide. Each length is 45-50 cm. Spread the strips with paper or a disposable hand towel in one layer. The width must match.
Then, using a spray bottle or pipette, moisten the surface with water without blurring it. Then place plant seeds on the paper at an equal distance (3-5 cm), 1-2 cm from the edge. Place another layer of paper and cling film on top.
You can secure the layers with a paper clip or wire, and then carefully roll the multi-layer strip into a roll, being careful not to damage anything. The roll is placed in a glass, at the bottom of which, approximately 4 cm, water is poured.
To help you remember what you planted, add a label with an indicator using a permanent marker. Such seedlings take up very little space! Comfortable.
Moscow method step by step
Toilet paper, napkins and towels are suitable for another method of soilless seedlings. It requires a transparent plastic bottle, which is cut lengthwise into two parts. The bottom of each is covered with a mass of paper, placed in several layers, constantly moistened.
On the second or third layer, you need to place the seeds in the “paper soil”, at an equal distance from each other. Then several wet layers are placed again, and a film or bag is placed on top of everything. The improvised greenhouse container is ready. As soon as the first shoots appear, the package can be removed.
landless seedlings
For cucumbers and tomatoes, sawdust is suitable as soil - one of the most popular methods of soilless seedlings. Moist wood pulp prevents plant roots from developing too quickly. There is just enough time for the seedlings to get stronger for the garden.
The sawdust is laid out in several layers in a container; it can be anything - plastic, glass, etc., but it is better to use a wooden box, the bottom of which is lined with film. Its dimensions range from 1.3 m to 2 m.
seedlings in sawdust
It is advisable to choose disinfected sawdust for planting seeds in them, and scald them with boiling water before putting them in a box.
After the seeds are planted, the surface is covered with film, and the box is placed closer to the light, on the window.
The roots develop well in the sawdust, and the seedlings will turn out great!
It is not necessary to have land to plant seeds before the summer season. Seedlings without using soil are practical, not wasteful, save space on the windowsill, and are also very simple.
He tries to find some innovation that will noticeably make it easier. A new method that would reduce costs, save space and time, and also protect as much as possible from possible development difficulties.
The recently appeared method of germinating seedlings in toilet paper without soil has already found many fans. What's good about it? If we remember botany and biology, not all seeds need the nutrients that are found in them to germinate.
In the seed itself, under the shell, there is already a sufficient supply of the elements it needs. Therefore, toilet paper, despite the lack of nutrition, is quite suitable as a substrate.
Its advantage is that, due to its softness, it allows roots to grow through it without getting tangled or breaking, which is important for plants.
The method is good for northern regions with late and cold spring. It can be used to germinate a wide range of crops:
 The method is not relevant for plants that are heat-loving and slow-growing: they still need to be grown in the ground, and besides, such crops need good light; germination in a roll, for example, is not suitable for them.
 Others that are resistant to cool temperatures can be planted from a roll into open ground, for example, leeks or onions.
Did you know? Toilet paper as a hygiene product first appeared in China, this can be judged from surviving records and drawings dating back to approximately 600 BC. It was available to the imperial court.
Let's take a closer look at two methods used in practice: growing seedlings without soil on toilet paper using plastic bottles.
This method is convenient because the seedlings have to be watered much less frequently. For sowing, a plastic bottle is cut along its length. Sowing is carried out on toilet paper folded in several layers, after having been moistened by spraying.  The seeds are lightly pressed into the paper layer, creating a pit effect. Place a plastic bag over a plastic container, imitating.
This method differs from the previous one in that the bottle is cut crosswise rather than lengthwise. Here the paper layer is alternated with a polyethylene film. Seeds sown on a moistened paper layer are covered with another similar layer, then with film, carefully rolled up and placed in a bottle.  The subtlety of seed placement is that the seeds are at the top, closer to the light. Approximately 2 cm of water is poured into the cut bottle and placed in a warm place. Water is sometimes added so that the seedlings do not lack moisture.
When two leaves appear, the roll is unrolled and the seedlings are planted into separate containers. The advantage is that you can replant without trying to remove the paper; it is soft and will not prevent the roots from developing properly, gradually dissolving in the soil.
This method is not much different from growing Moscow-style seedlings in a roll; the difference is that the rolled planting material is placed in a disposable cup and placed in a plastic bag, creating a greenhouse effect.Important! It should be noted that the seeds should not touch each other and be at a distance of less than 2 cm. As the roots develop, they will become entangled and may be damaged when picked.
You don’t need any special effort or knowledge on how to plant seedlings in toilet paper. What doesn’t hurt is to make sure that the method is appropriate for the selected plants.
Required items and materials:

The sequence of actions is as follows:
 The paper base will absorb the moisture the seedlings need, and the film will provide a greenhouse effect.
 Another similar method is to plant seeds in a snail with toilet paper. Seeds are also sown on a strip of paper and rolled into a snail, using a laminate backing for insulation.
The method attracts 100% germination, but due to crowding, most seedlings become very elongated, and the roots do not develop as they should.
Did you know? Mass production of toilet paper began only in the middle of the 19th century in the USA; it looked like cut paper sheets packed in boxes. Perforated and rolled, it began to be produced at the beginning of the 20th century; the idea belonged to the Germans.
The seedlings have hatched, the first leaf has appeared - it’s time. To do this, prepare an aqueous solution of the mineral complex; the dosage is taken two times less than stated in the instructions. The fertilizer is added to a glass with water. In the phase of 2-3 leaves, fertilizing is repeated. Fertilize with the same solution.  Monitor the water level at the bottom of the container; it must be added regularly.
There are many ways to grow tomato seedlings. Recently, this procedure has been performed using a plastic bottle. The container is safe, you can grow seedlings and pick in it.
Growing tomato seedlings in a plastic bottle has many advantages:
Growing seedlings in this way cannot be done without a plastic bag, a transparent plastic bottle (preferably 2-liter), toilet paper and seeds.
Before sowing the seeds, you need to carry out a selection. Only large and dense seeds are suitable for sowing. They can be selected manually, using tweezers, or using a special solution. Pour the salt with water, stir and pour all the seeds from the pack into the resulting salt mixture. Hollow, small seeds will float to the surface and need to be thrown away.
Those seeds that have fallen to the bottom must be subjected to a disinfection procedure. There are a lot of bacteria and fungi on the seed coat, which need to be gotten rid of in time. You can place the planting material in a weak solution of potassium permanganate for 30 minutes.
In the future, some vegetable growers carry out the germination procedure. The seeds are distributed on a wet cloth, covered with another layer of wet material and placed in a warm room. As soon as the sprouts hatch, you can begin planting.
To grow seedlings, you can choose any plastic or wooden container. If you don’t have a suitable container on hand, you can use a plastic bottle of milk, juice or water.
How to plant tomatoes using a new method? There are several known methods for growing tomatoes in plastic bottles.
Option number 1, also called vertical, does without land. For tomato seedlings, a 2-liter bottle, which is divided into two parts, is useful.
The part with the bottom will be useful:

You can add any fertilizer and place the bottle on the windowsill where there is good lighting.
Option No. 2 - horizontal method of growing tomatoes in toilet paper, which is carried out without soil:
Tomato seedlings planted using these methods do not need to be watered, since the greenhouse effect remains under the film.
As soon as two leaves appear, the seedlings begin to be transplanted into separate containers. To do this, simply unroll the roll or remove the sprouts from a horizontal container.
How to grow tomato seedlings in a plastic container, there is also option number 3 which involves preparing the soil.
Prepared seeds can also be planted in five-liter bottles. For planting, you will need a part of the container with a bottom, into which you fill the soil, make holes and sow the seeds.
Many vegetable growers choose plastic containers for seedlings. Reviews about this experience are only positive: “In recent years, I have been growing seeds only in five-liter plastic bottles, which I cut in half. I don’t make holes in the bottom, since the container is transparent, and you can see how long the moisture drains when watering. I use the crushed shells of several eggs as drainage, then add a layer of sand and soil suitable for the variety.

I always disinfect the soil by pouring boiling water over it. After the earth has cooled, I make holes into which I place the planting material. I sprinkle compost on top, cover the container with film and move it to a warm place. The film retains heat inside, creates a greenhouse effect, and shoots will appear simultaneously and quickly. After the shoots emerge, I remove the film and lay out the seedlings on the windowsill.
As soon as the time comes for transplanting into open or closed ground, the soil is watered abundantly, the bottle is squeezed, and the sprout along with the earthen lump freely come out. We plant the seedlings at a large distance from each other in fertilized soil.”
This way you can see that growing a tomato in a plastic bottle is simple and convenient. The container does not need picking, water does not flow out when watering, so there is no need for pallets, and the grown bushes quickly take root in any place.
After two leaves develop on a young sprout, it is necessary to transplant it into separate containers. Seedlings can be picked in plastic bottles.

When the weather outside is bad or even winter, you can pick up seeds intended for indoor growth. If you plan to grow tomatoes on your balcony or windowsill, you can use a large bottle.
You can grow tomatoes in 5 liter bottles on the balcony windowsill. The top and neck are cut off, and suitable soil is poured into the bottom.
If there is not enough space on the balcony, then you can make an improvised hanging pot from a plastic bottle. To do this, you need to take a plastic bottle with a volume of 1.5 or 2 liters. For the work, only the upper third of the bottle with the neck is required, so it is cut off. At the edge of the cut, holes are made on opposite sides through which a thick rope is passed. It is on this that the structure will be suspended.
As soon as the seedlings are two months old, they can be transplanted. The landing will be unusual. The sprout is removed from the cup along with the earthen lump. The bush is turned over with its growth point down and pushed through the neck. The roots remain inside the plastic container and are covered with soil. After the container is completely filled with soil, it must be watered.
Further care consists of watering with a watering can and regular application of fertilizers. Some varieties of tomatoes require pinching the growing point, cutting off side branches and tying up the stem.